Why learn how to debone? And where to start? These are the questions we will answer in the article!
How do you debone a raw ham? Let’s try to describe it, but perhaps first we should start with another question, which perhaps will give you some more reason, in addition to simple curiosity, of course, to read the article: why deboning a raw ham instead of buying it already without bone?
First of all, because knowing how to debone a raw ham allows you to choose which one to propose to your customers among infinite hams
This is because, as you know, not all the hams are deboned by the producer: very rarely the long agings, almost never the niche proposals.
The second valid reason is the follwing: with a little practice, you will be able to control and minimize the waste resulting from the deboning.
An interesting advantage, especially for those who work a lot with raw hams! If you have to see to believe, we give you some numbers verified by us (here you have to trust though!): we called Paolo Morosin, owner of a deli shop in Treviso, to observe a live deboning and with the occasion we weighed the waste at the end of the operation.
The ham weighted 9.9 kg and the waste was 2.4 kg. Maybe, you might think about it!
What we have learned from Paolo, in addition to what you will find in the following lines, is that deboning a ham does not only mean eliminating the bone, but also having extreme respect in handling the product, be sensitive to the problem of waste both for a matter of yield and because it would be a waste of goodness, and finally to keep in mind the service trying to make the deboned and tied ham beautiful and inviting to the sight.
And now that we have valid reasons to consider deboning, let’s see together what are the main steps of the technique we learned from Paolo.
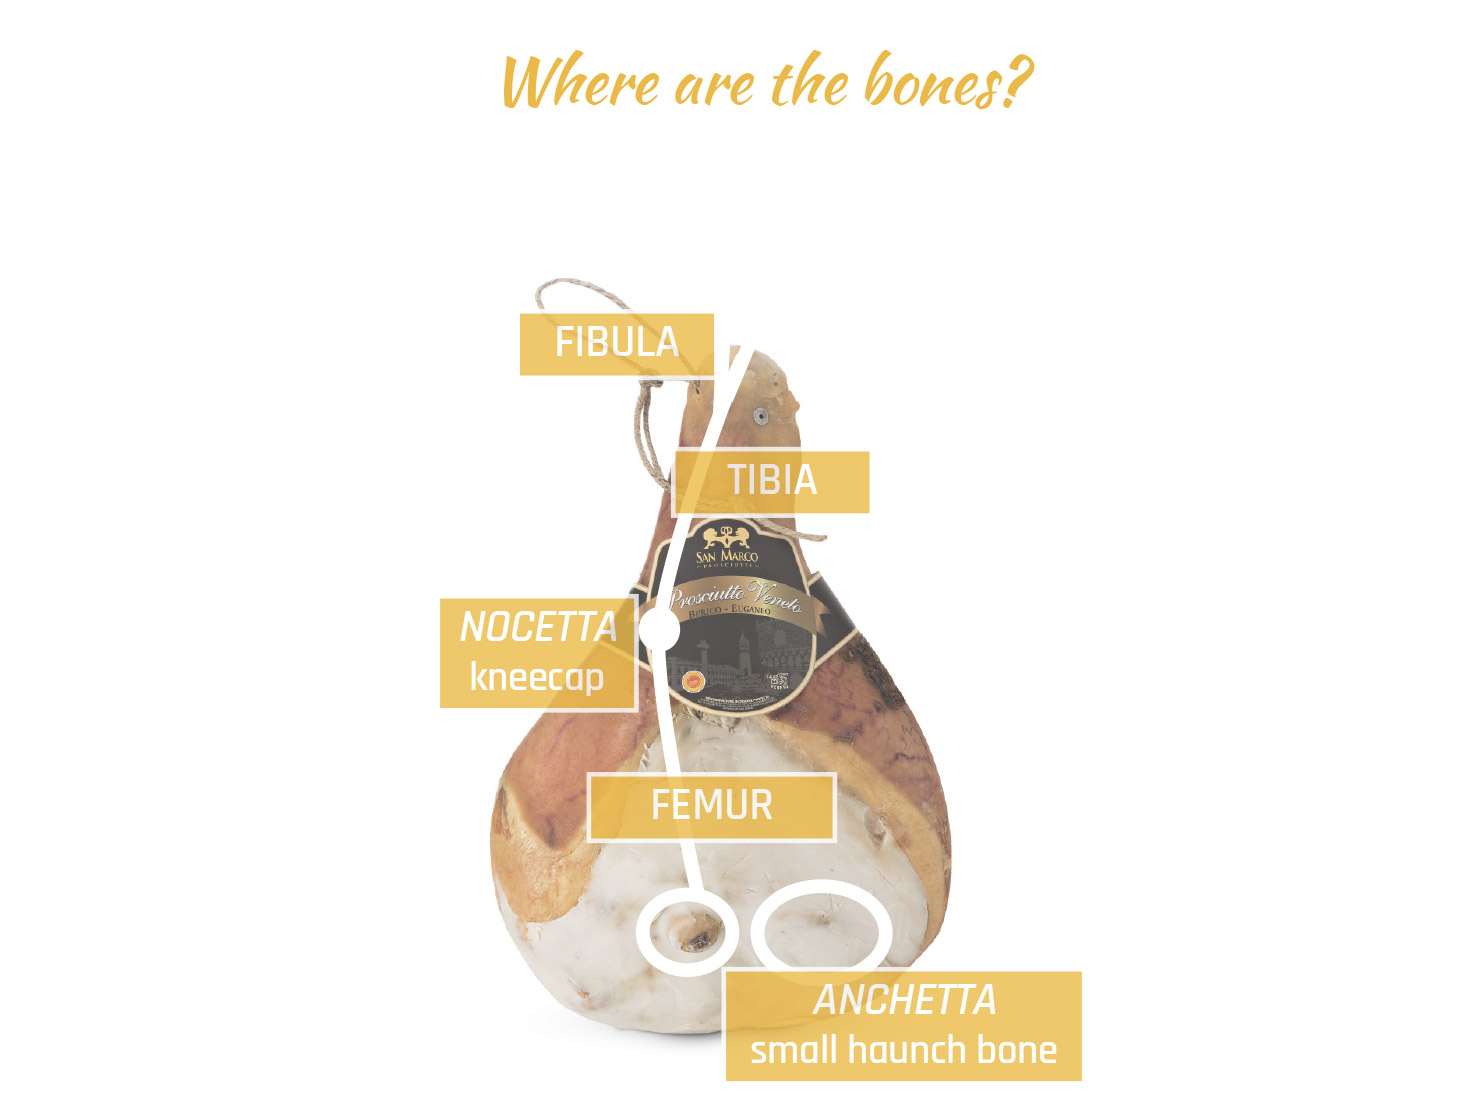
1 | THE TOOLS
You will need two boning knives with hard blades, a small one for the incisions around the bones and a larger one for the small haunch bone and the cleaning of the covering lard, a gouge to facilitate the extraction of the bone, a hacksaw for the final part of the leg and finally ropes to tie the boneless ham.
2 | THE CLEANING
Clean the covering lard from the ham (pic. 1): it is very important to remove only the covering lard, so try to be very precise and to protect the lean part of the ham as much as possible, making a minimum waste.
The secret is not to cut large slices of lard just to speed up the work, but to proceed in a meticulous way, making small cuts following the shape of the ham.
In addition to the covering lard, must also be removed all those yellow parts which compromise the flavour and are ugly to see.
Once you have finished cleaning the covering lard from the thigh, trim the rind on the back following its original arc shape.
At the end of the cleaning operations it will be enough to massage the meat a little to compact it and hide the marks left by the knife. At this stage you can save yourself from cleaning the haunch bone because it will have to be removed in the next step.
Picture 1 and 2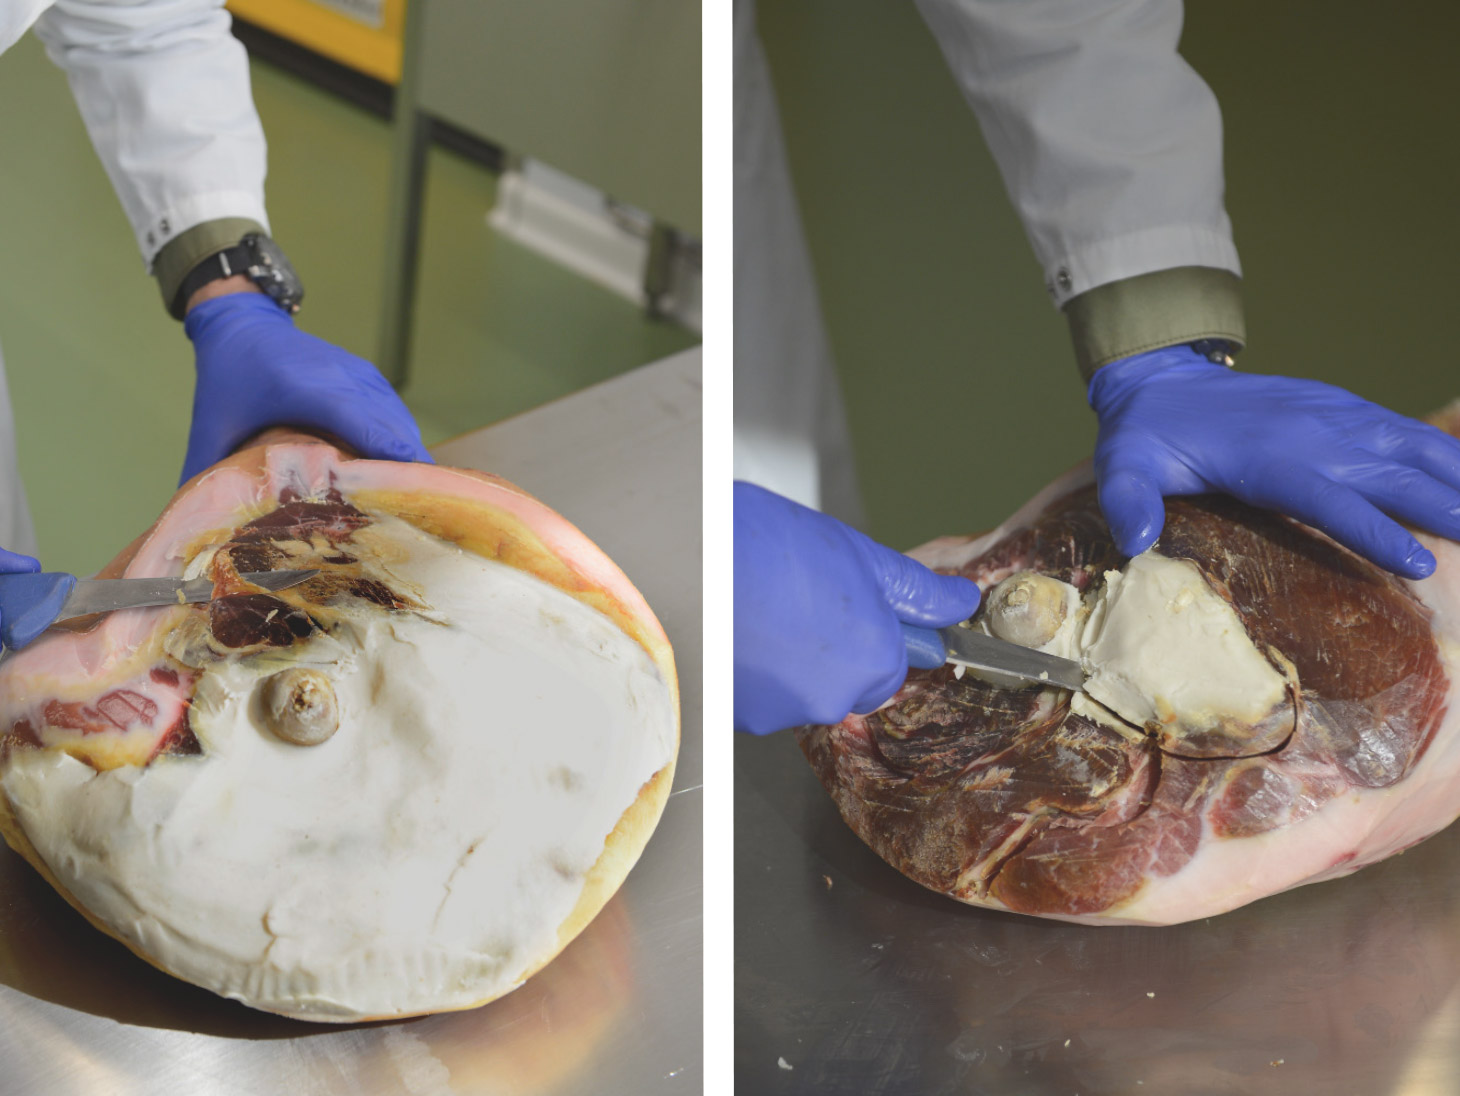
3 | REMOVAL OF THE HAUNCH BONE
Carve the meat around the anchetta (small haunch bone) (pic. 2), without forcing the blade but letting the bone guide you.Raise the bone levering with the knife and cut the bone at the base.
Clean well the remnants of covering lard and trim the cut to make it more elegant and tidy. A tip: there will certainly be some meat left on the anchetta (haunch bone) from which you can guess the consistency of the ham. It will be compact if it has received the right salting otherwise it will give the impression of being slightly soft.
4 | REMOVAL OF THE MAIN BONE
With the hacksaw cut the final part of the leg. Some prefer to remove it together with the central bone, but to speed up the work a little it is possible to saw and remove it before moving on to take care of the deboning.
We then proceed with the incision: insert the knife at the height of the femoral head and make an incision along the entire central bone (pic. 3) until reaching the final part of the leg.
You must not force the blade which must follow, letting itself be guided, the path of the bone that develops with a curvature. (Pay attention to the position: the ideal is not to stay with the body in the path of the knife, in case it escapes at the end of the cut!)
Then make a second incision around the head of the femur (pic. 4) and then insert the gouge while working around the bone to facilitate the detachment of the meat.
Picture 3 and 4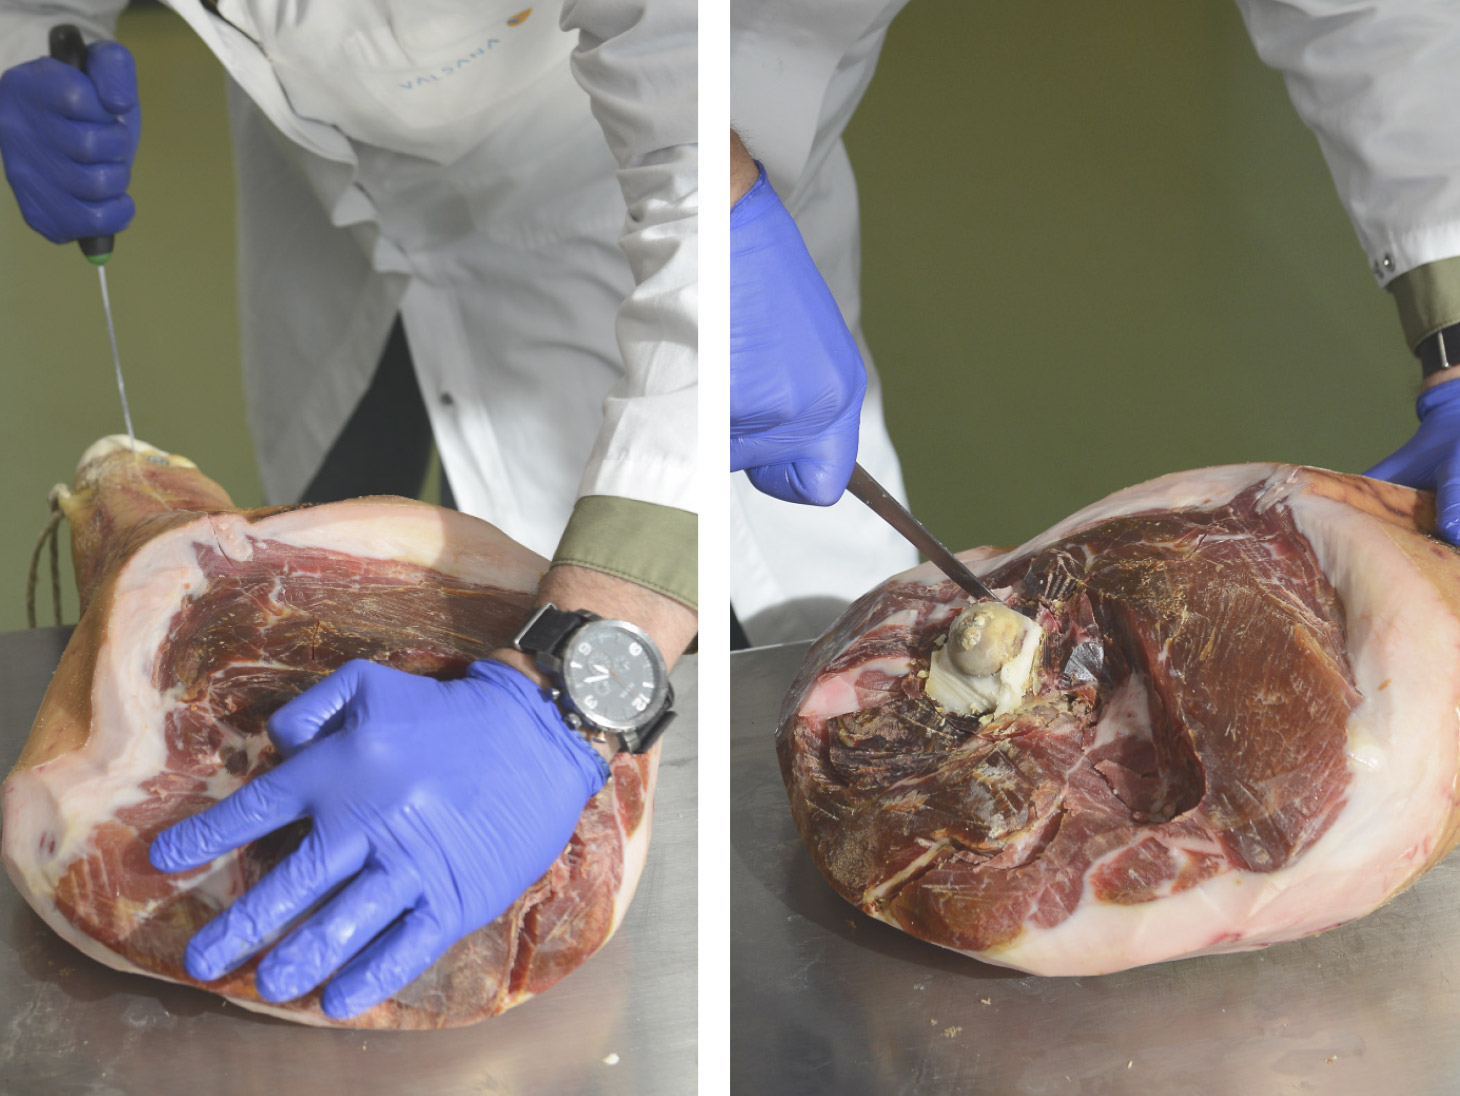
Once this operation is finished, insert the gouge under the femur so that it allows you to leverage from below exposing the bone, helping yourself to open the two sections of the ham by applying force with your hands (pic. 5) but being careful not to cut yourself with the rind.
At this point, with the knife, continue to free the bone from the meat until it is completely detached. Finally, the last two smaller bones will remain to be removed.
The first is located at the top near the final part of the leg that we previusly sawed and represents what the fibula would be in a human, while the other is the nocetta or kneecap, a round bone positioned in the joint between the femur and tibia (pic. 6).
Then clean the ham from any infiltrations or yellowed areas (especially in the top part) and trim the cut properly.
There will be holes, for example that of the kneecap, which you can fill using any parts of lean that may have remained around the bone or on the anchetta: in this way there will be no emptiness, which are uncomfortable, unpleasant to see and dangerous for the ‘oxidation.
Finally, remove a vertical section of rind from the central area, so that it does not remain inside the ham once tied: in fact, by tightening the bindings, the two sections of meat will overlap. But be careful not to remove the whole mark!
Picture 5 and 6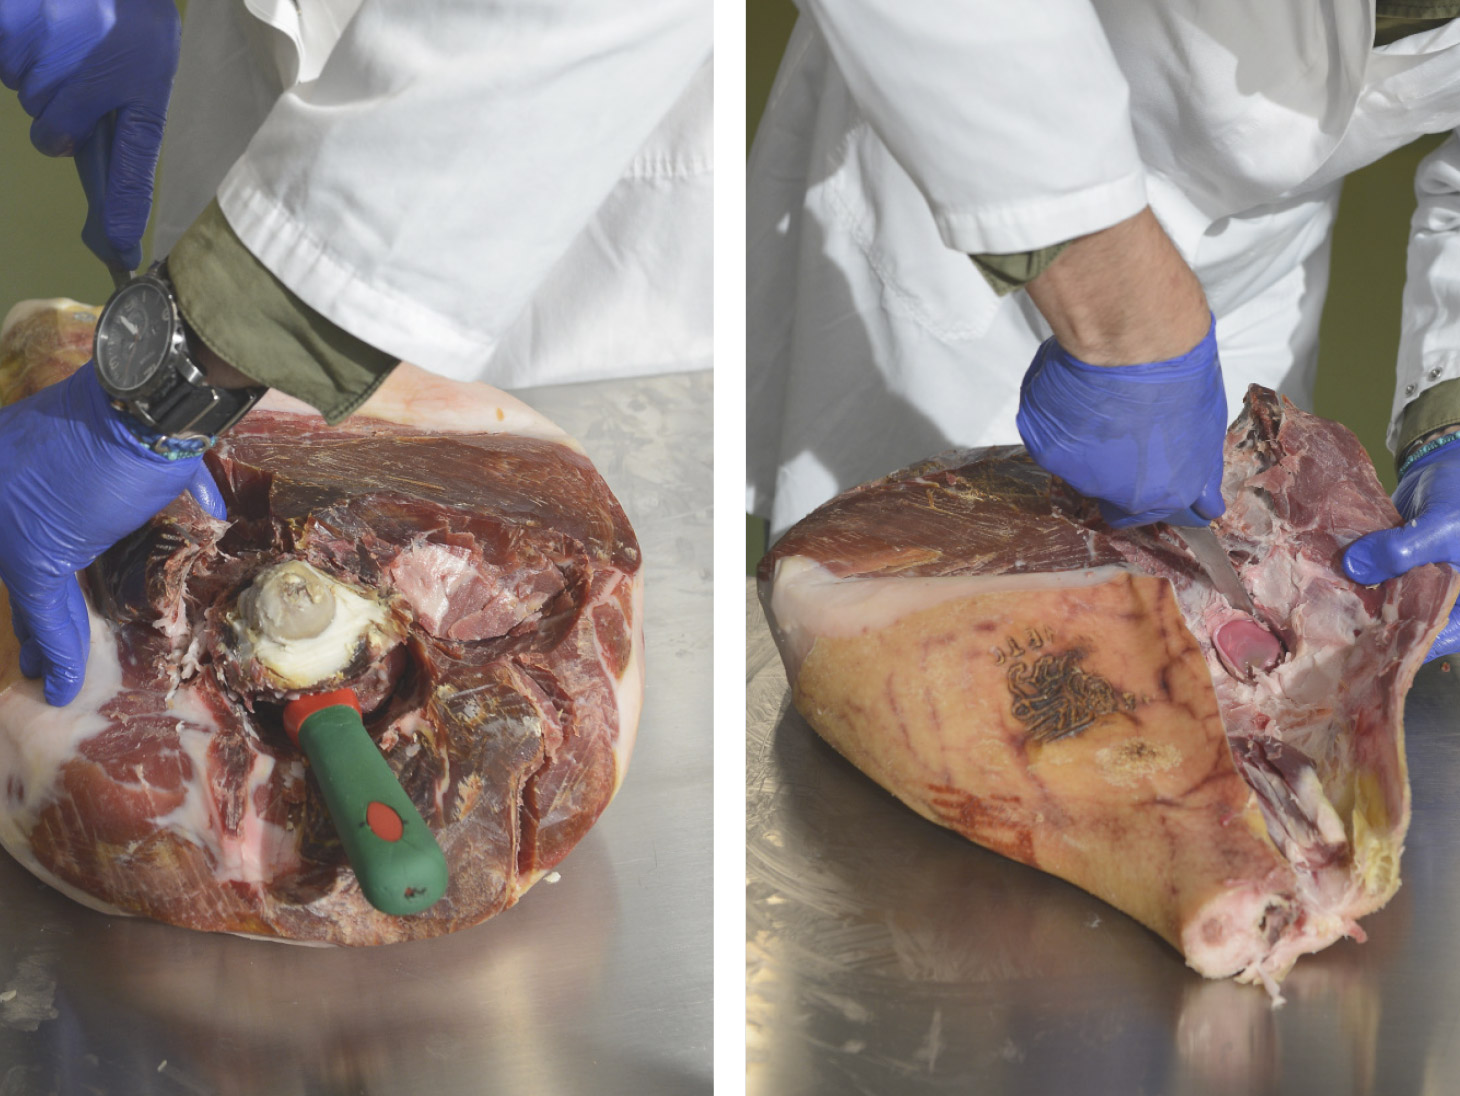
5 | BINDING
For binding, provide a 4 or 5 ropes closure so that the ham remains tightly closed and is aesthetically beautiful at the sight.
Starting from the widest part, create a half lunette on the rind (see incisions on the side in pic. 7) on both sides in a symmetrical position, so as not to slide the ropes. Insert the rope and make a slip knot, or any other sliding knot that allows you to pull the rope as much as possible.
We suggest using a tool that allows you to exert greater force in tightening the rope, for example also the base of the gouge itself (pic. 7).
Once complete, lock the sliding knot with an additional simple knot so that it stays firmly in place.
Proceed gradually with the other bindings, remembering to accompany the meat of the ham so that it is well closed and be careful to keep all the knots at the same level and on the same side.
Finally, trim the rind and recompact the inside of top part of the leg so as to obstruct any cracks as much as possible.
The ham is now ready to be placed on the machine and sliced! (pic. 8)
Picture 7 and 8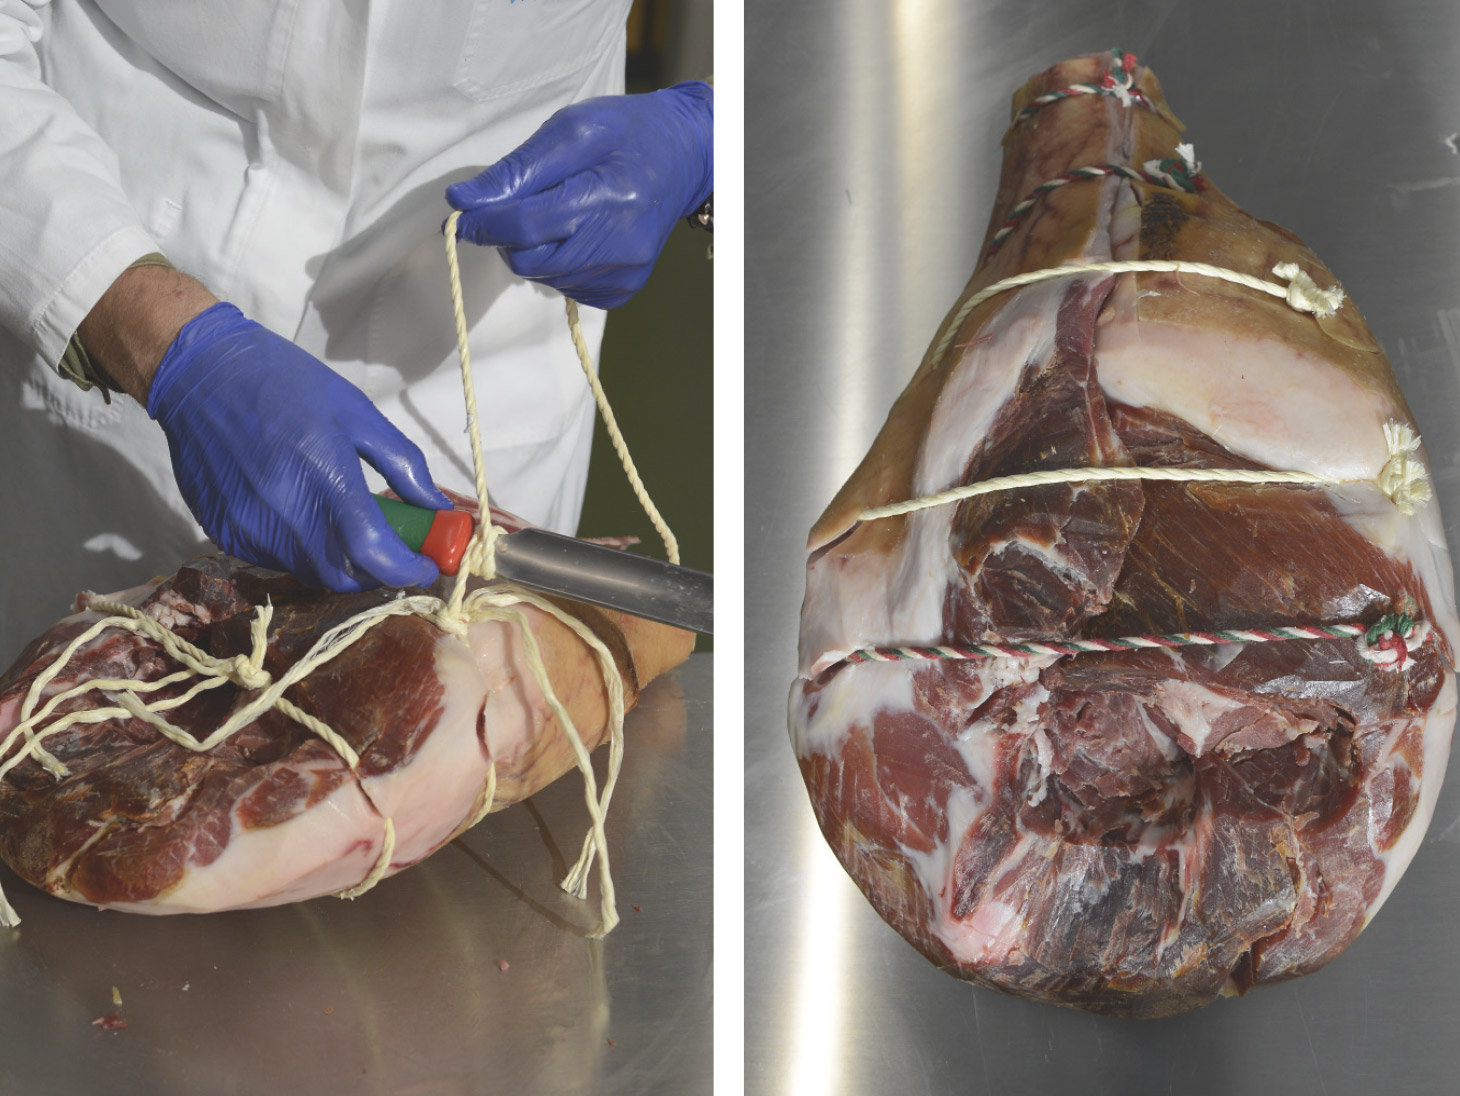
Giulia Bassetto
Marketing e Comunicazione


